Why it's important to make an account for each administrator and the importance of closing a shift at least once a day.
- Opening a shift
- Client's deposit replenishment
- Setting up a session
- Booking gaming stations
- Selecting multiple gaming stations
- Working with the shop
- How to end a shift?
- Tips to simplify the operator's work
Opening a shift
- Log in to the admin panel with operator rights.
- Select the gaming center you are working in.
- Enter the amount of cash at the beginning of the shift.
All done! You can start working!
Сlient's deposit replenishment
Select the Replenish deposit option after clicking + in the operator's quick menu. You may also open the modal window with the CTRL+ALT+D key combination. You can also open this window in the Gaming stations or Map tabs by right-clicking on the host where the client is logged in and selecting the Replenish Deposit option from the context menu.
When the form opens, fill in all fields:
- Client's phone number (if the window is opened via the host's context menu, the number will be filled in automatically);
- Deposit amount;
- Payment method (If cash payment method is selected, the change will be calculated automatically).
After the client has paid the required amount, click Pay.
Setting up a session
- Click the Gaming Stations tab or the Map tab.
- Select the desired PC, then right-click on it.
- From the drop-down list, click Select rate.
- In the modal window that opens:
- Type in the customer number and select an existing account from the drop-down list (or specify nothing to set up a guest session).
- Select the desired pass (or more than one) from the list.
- Select the payment method.
- After the client has paid, click Pay (if cash integration is enabled and payment is made by card - before the client pays).
IMPORTANT!
You cannot set a rate on your account when your shift is open.
Booking gaming stations
Creating a reservation:
-
Right-click on the desired gaming station and select Reserve on the map or in the gaming stations table. It can also be selected from the quick menu on the Dashboard.
Alternatively, click To book on the Booking system tab. - Enter the phone number of a registered user (or leave the field blank if the guest has not yet been to your gaming center).
- Enter the date, start time of the reservation, and estimated session time.
- Select the required number of PCs.
- Add additional information, such as the client's name or phone number.
- Click Book.
IMPORTANT!
-
If you try to book a gaming station from the Booking system section, the reservation start time will be moved to the nearest available time after the end of the current session/reservation + the time specified in the Strict reservation setting with a corresponding message in the top left of the reservation creation window.
Editing a reservation
- Right-click on the required PC and select List of reservations on the map or in the gaming stations table. A window with all reservations of a particular PC will open.
- Select the desired reservation from the list and click on the editor (pencil icon).
- Edit the necessary information.
- Click Update.
Deleting a reservation
- Right-click on the required PC and select List of reservations on the map or in the gaming stations table.
- A window with all reservations of a particular PC will open.
- Select the desired reservation from the list and click on the editor (pencil icon).
- Click the delete icon (stop icon).
Selecting multiple gaming stations
Gaming stations section
You can select multiple gaming stations in the Gaming stations section using the Shift (selects the area) and Ctrl (selects individual gaming stations) buttons. You can also select all PCs in a zone by checking the box next to the Select All option in the upper right corner of the zone.
If gaming stations are selected in one zone, then once selected, you can sell multiple passes, create multiple bookings, send multiple notifications, and manage the power supply of all selected PCs. If you select gaming stations in different zones, you can do all of the above, except sell multiple passes.
Map
You can select multiple gaming stations in the Map section by using the mouse to select an area and the Ctrl key to click on individual PCs.
If gaming stations are selected in one zone, then once selected, you can sell multiple passes, create multiple bookings, send multiple notifications, and manage the power supply of all selected PCs. If you select gaming stations in different zones, you can do all of the above, except sell multiple passes.
Client registration by the operator
To register a client in SmartShell:
- Click on the Create a client button using the operator's quick menu.
- Enter the nickname, date of birth, phone number, and email address.
- Enter the client's name. Optional
- Pass the verification with Captcha.
- Call from the number you specified during registration to the number displayed in the modal window (the call is free from any country in the world).
- If the call is impossible, you can confirm the client's account registration using additional methods:
- Via incoming Email to the specified Email address. You will need to enter the code provided in the letter.
- Via Telegram linked to the specified phone number.
- Click on the Create button after entering the confirmation code.
After registration by the operator, the client's password will be their phone number. The client will be prompted to change the password during their first login in Shell.
If you close the modal window before entering the confirmation code, registration of a client with the same phone number can still be completed within 5 minutes.
IMPORTANT!
To allow client registration by the operator, a gaming center employee with access to the settings (Manager or Owner role by default) needs to enable the function in the corresponding section of the Admin panel’s settings.
Working with the Shop
Selling goods
To sell a product/service/combo set, follow these steps:
- Enter the client's login. Optional.
- Select the desired goods/service/combo set. Clicking the item or service again will increase the quantity.
- Specify a discount or promo code. To apply a discount, the discount function must be enabled in the goods card.
- Choose the payment method.
- Click Pay.
Adding goods to the warehouse
To add an item to the warehouse, follow these steps:
- Click the Add goods in the warehouse button in the top right corner.
- Add goods and enter the quantity to be added/written off.
- Add a comment about the operation made. Optional.
- Click on the Add button.
After a successful Add/Write off operation, the corresponding record will appear in the Logs section.
Payment Cancellation
If payment cancellations are allowed in the settings, you can cancel a payment in the Payments tab, provided the cancellation period has not expired since the payment was made.
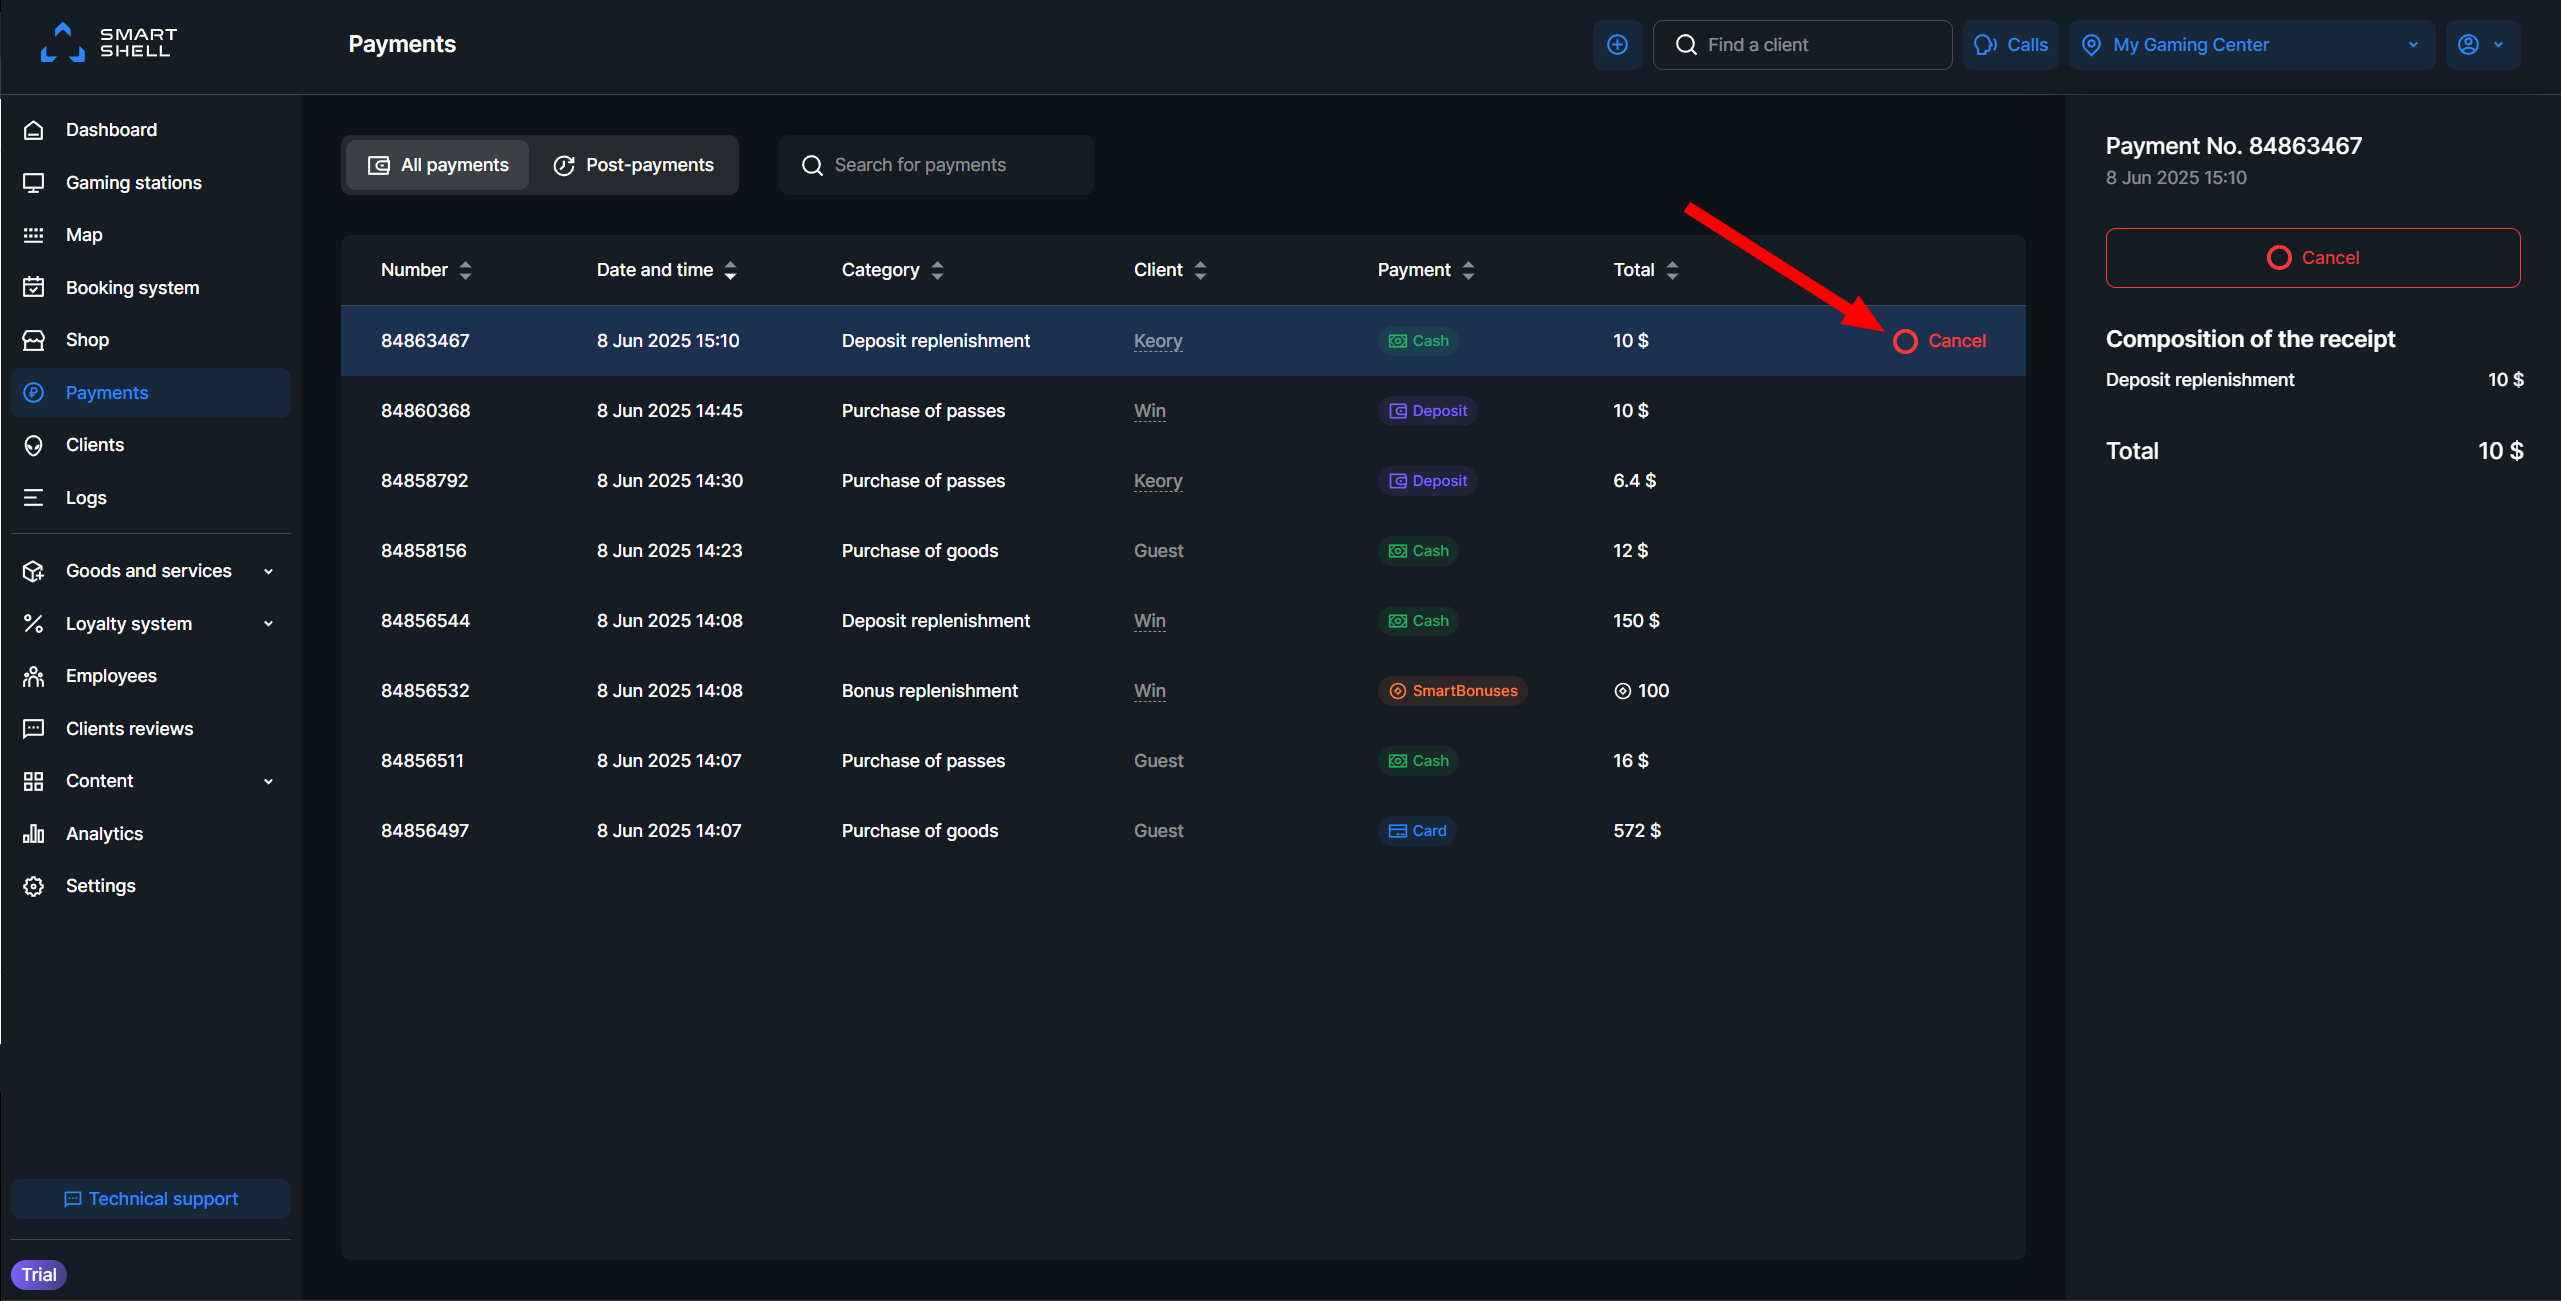
IMPORTANT!
You can cancel any payment for goods or services that falls within the cancellation period, but only the most recent payment for rates.
How to end a shift
- Go to the employee menu.
- Select End the shift.
- Check the cash and non-cash reconciliation with the data in the admin panel and click Next.
- Print the report and complete the shift.
Done! The shift is complete, and the next administrator can start a new work shift!
Tips to simplify the operator's work
- You can select several PCs in the Gaming stations tab by pressing CTRL and selecting the necessary ones.
- The CTRL+ALT+D key combination will immediately open the deposit replenishment window.
- Acceptance of goods takes place in the Shop tab by clicking on the Add goods in the warehouse button. You can also leave a comment there.
- To keep the amount of cash on hand up-to-date, you don't need to memorize anything and keep it in your head. Write out a payment or receipt order during the shift.
- Easily search through the logs.
- The status of license pools can be tracked on the dashboard. You will see its current status, which computer it is used on, and can release it, if necessary.